GitHub Classroom
Tutorials
HelloRob uses GitHub Classroom to create, submit, and test code. Your assignments will be stored as a GitHub repository under your course’s GitHub organization. The repository will be private, meaning that your code will not be visible to your classmates or anyone else on the internet. You and the course staff (and your teammates, for group assignments) will have access to your code.
You can learn how to use GitHub in our GitHub tutorial.
Contents
Accepting an Assigment
To accept a new assignment, your instructor will provide you a GitHub Classroom assignment link. Each assignment will be configured with template code and sometimes tests. You can read more about tests in the next section.
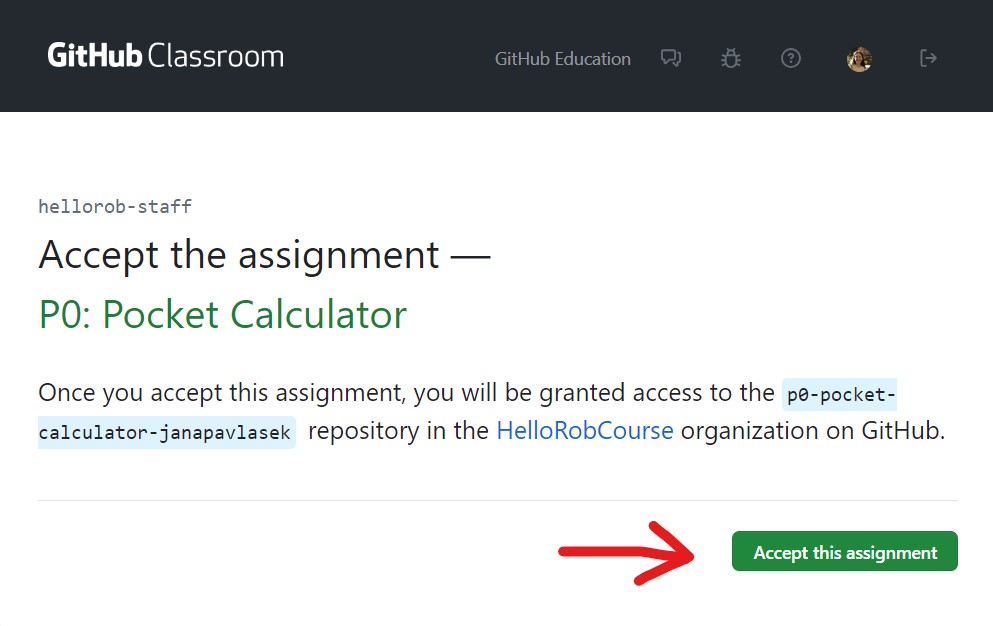
When you click the link, you will see a page that looks like this. Click “Accept this assignment”.
Team Assignments: If this assignment is done in teams, you will be asked to create or join a team. Make sure you follow your instructor’s guidelines for naming the team. The first person will create a new team. The nest teammate(s) should then join the team.
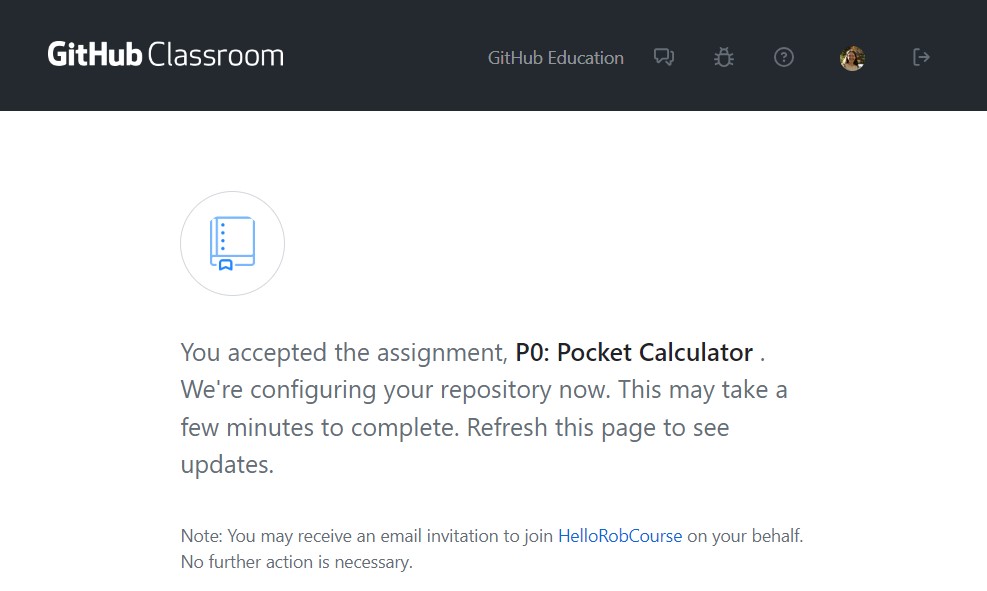
Once the assignment is accepted, you will see a page that looks like this. Wait a moment and then refresh the page.
When your assignment is ready, you will see a page that looks like this. Click on the blue link to access your new repository.
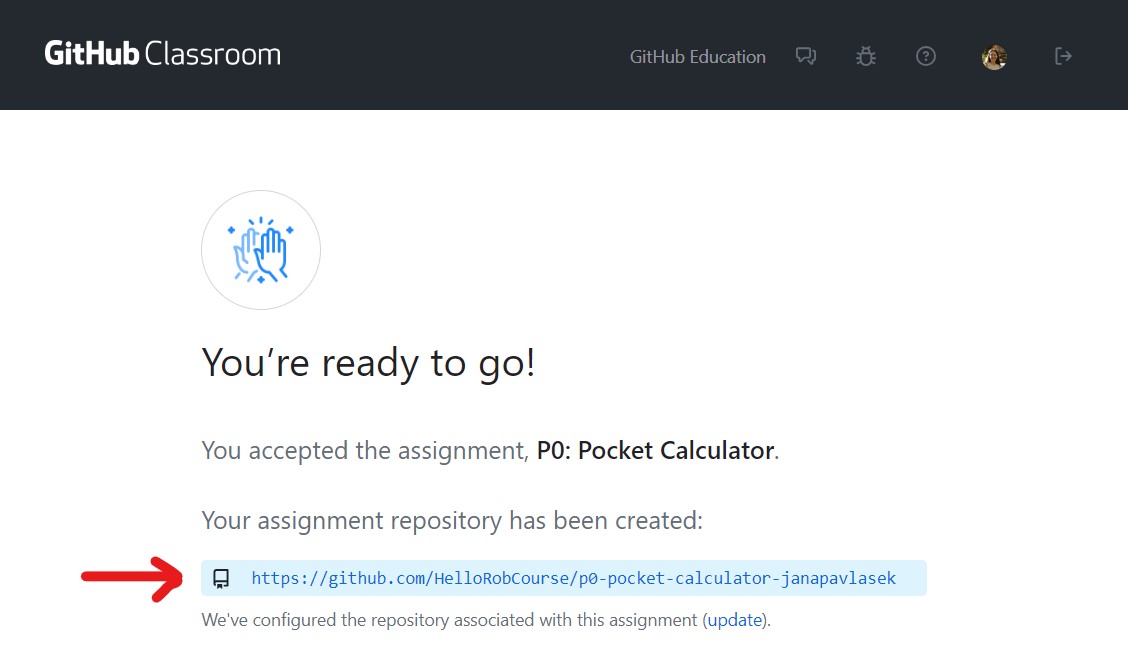
You’re ready to start coding! Your newly created repo will have any template code in it to get you started. You can get the link to your repo to clone it from the green “Code” dropdown.
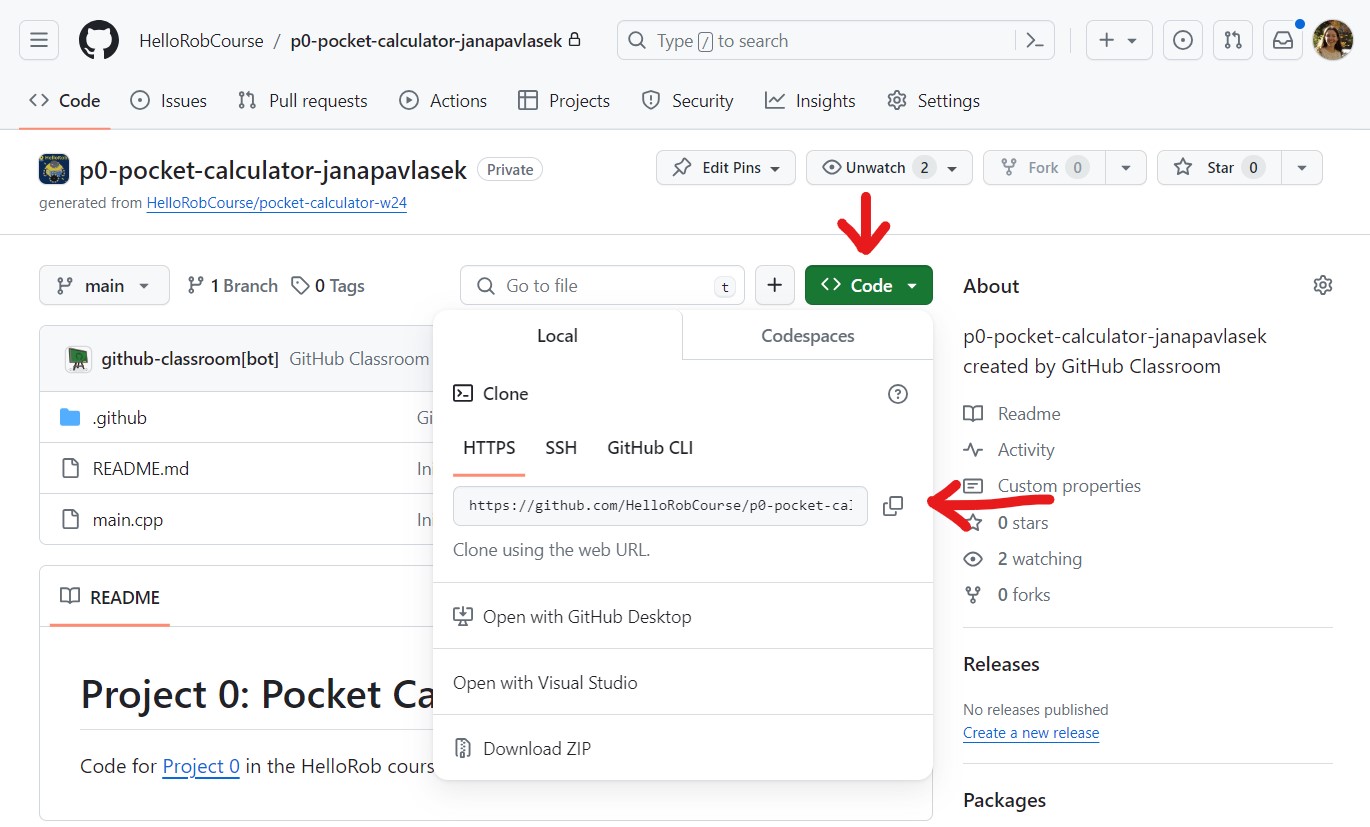
Make sure that you push any of the code you have written to this repo for your projects in this course. This will make sure staff can access it and give you a grade! You can review the GitHub tutorial for help with this.
Next, see how to see if your code passes the autograder tests!
Autograder
Some assignments will have autograder tests built in, which will help you test whether your code is working and which your instructors will use to grade your code.
Instructors might have more test cases that are hidden from you. The autograder tests passing does not guarantee your grade!
In GitHub Classroom, the autograder is configured to run every time you push code to your repository. If you don’t know how to push code to GitHub, review the GitHub tutorial.
Autograder Workflow
A workflow for working on an assignment might look like this:
- Clone the code onto your computer.
- Write your code (follow the instructions carefully!).
- Test your code locally, by compiling and running it to make sure it works as described in the instructions.
- When you think you have it working (or partially working), push your changes to GitHub.
- Check the autograder results.
- If the autograder tests fail, return to 2.
Autograder Test Results
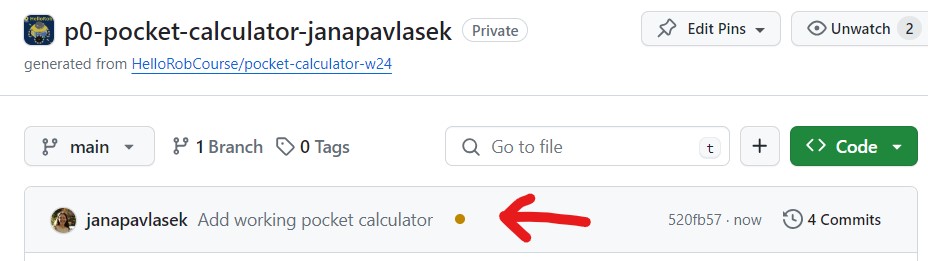
When you push, you will see an orange dot beside your latest commit, which indicates that the tests are running.
After a few minutes, the icon will update (you may need to refresh the page). If you see a green checkmark , the tests passed!

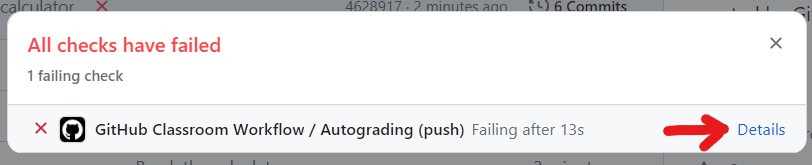
If you see a red X , some or all of the tests failed.

Note: You will see the red X if any test fails, even if some are passing. If you are working on a repo with multiple parts (for example, checkpoint repos with multiple checkpoints in them), you will have to look at the test details to see whether the part you were working on passed. Read on to learn how!
Viewing Test Details
To see the detailed results, click on the test status symbol beside the latest commit ( or ) and select “Details”.
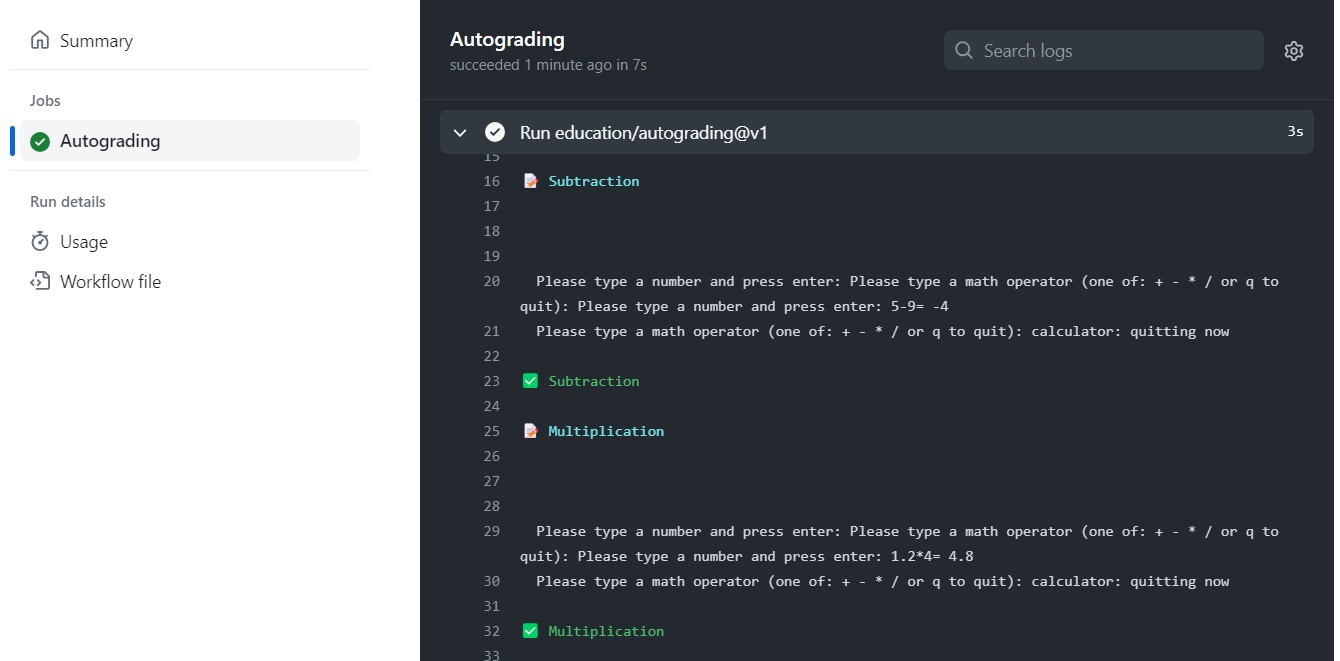
You can look at the output of all the tests under the GitHub Action that ran the tests, accessible by clicking the test symbol as above, or from the “Actions” menu. Below, you can see that some tests passed. For example, the subtraction test passed because the code correctly computed and displayed the sequence 5-9=-4 (note the symbol beside that test name).
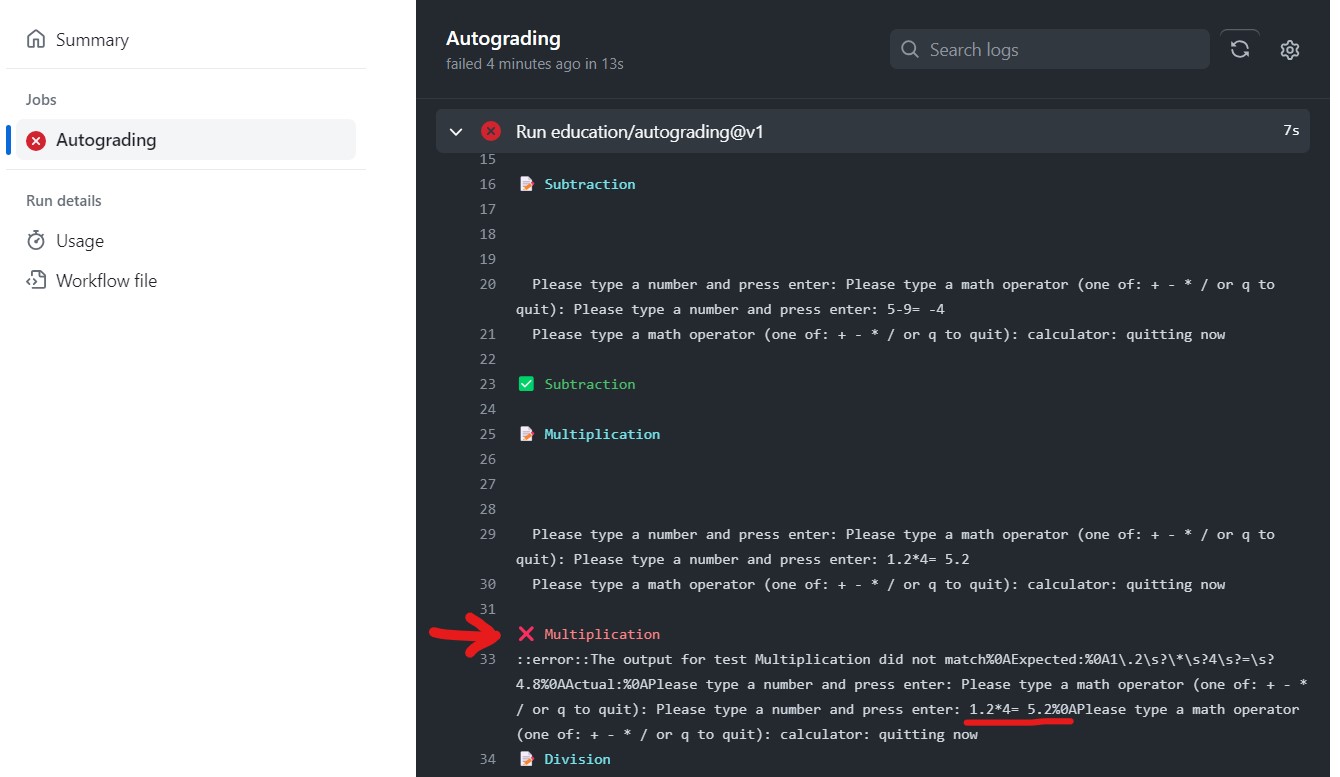
It looks like the “Multiplication” test is failing (note the symbol). The code said that 1.2*4=5.2! The output may be a bit hard to read at first, because the output appears on the same line. Ignore the %0A symbol at the end. That represents the new line printed out after the equation.
Looks like we are adding instead of multiplying for the * operator… Now, let’s correct it and commit and push the updated code.

The tests passed! You can look at the output and see what tests were run. The multiplication test is succeeding now!